How to Use filters
Filtes are a key feature in Cart , it allows your users to filter products according to their references. Cart Filter is very flexible search tool and easy to extend or customize to meet users requirement and help users find products they want. The filter can even display searching options differently in each page based on content of the page.
Create New Cart Filter Group and Filters
From your Cart back-office, go to: Catalog > Filters then click on the Insert button to open the panel which allows us to create new filter group and filters.
Filter Group Name is the title to distinguish the filters when you have many sets of filters.
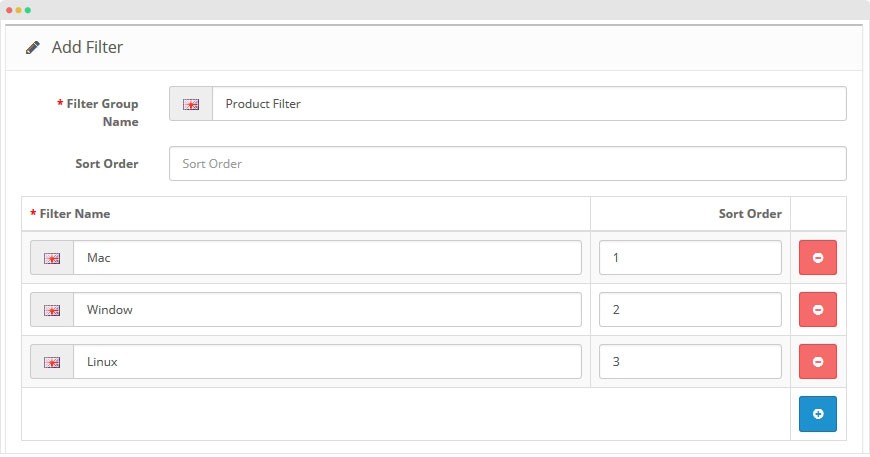
Next, add filters for the Filter group. Once done, click on the Save button to commit the changes.
Assign Filters to Categories and Products
We’re done with filter group and associated filters creation, now, let's assign the filters to the relevant category and products.
Assign Filters to a Category
Open the editing page of Cart category you want to assign filters to. In the Data tab setting, you will see the Filters fields. So you can select the values by just typing a few letters. After assigning all the filters for the category, hit the Save button to commit the changes.

In the front-page of the category, you will have a filter with 3 filters assigned from the back-office.
Assign Filters to Cart Products
Now we need to assign filters to each product to be filtered by Cart filter module. Go to: Catalog > Products and edit the product you want. Under the Links tab you'll see the Filter field. Select the filters for the product and save the settings.

Do the same way to assign filters for other products. Also, you can assign more than one filter to the same product if needed.
Install and Enable Cart Filter Module
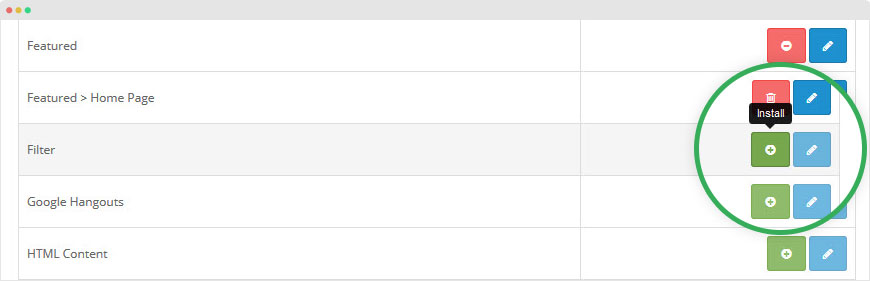
We're almost done with the setup! The last thing is installing and enabling the Cart filter module and assign it to the appropriate layout in the frontÂend. Go to Extensions > Modules and install the Filter module.
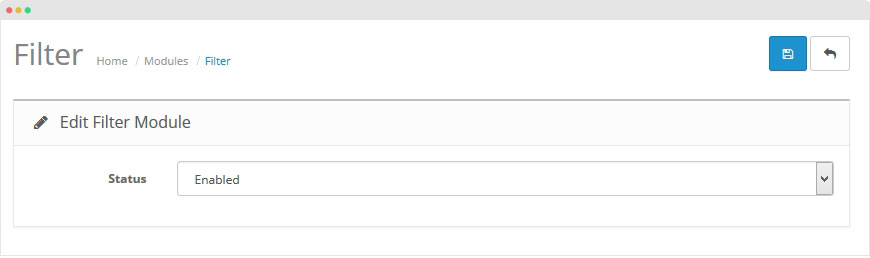
After the Filter module is installed successfully, click on the Edit button to open the module configuration page, enable the Filter module then save the settings.
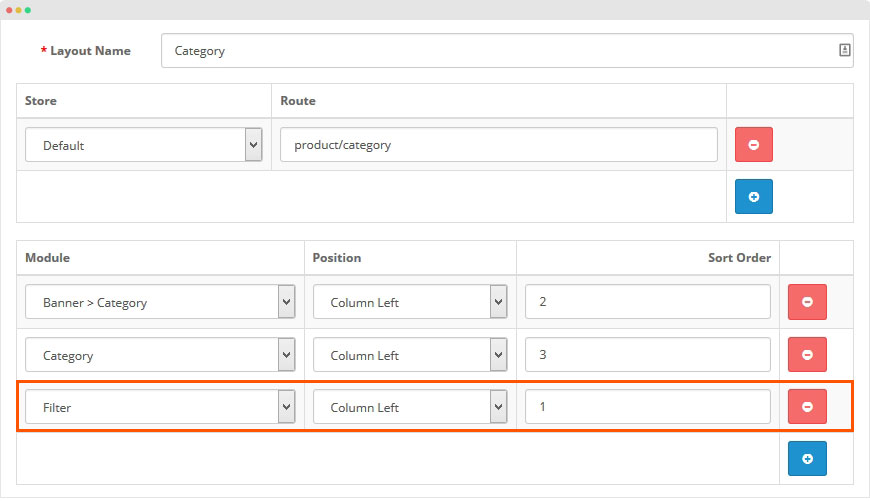
In this tutorial, we just display the Filter module in the "Category" layout page so when a user browse the products by category, the "Filters" module will be helpful in filtering out the products. Go to: System > Design > Layout, find the "Category" layout and edit it.

In the configuration of the Category layout, add new module and assign "Filter" module, select position to display the module in the layout.
How the Cart Filter works in Front-page
The setup is done, it's time to check how the Filters work in the fronÂt-end. In the front-end, go to the category page that we assigned filters to and you should see the Refine Search block on the left sidebar.

So as you can see, it's a really nice-looking block showing the different filter options, with the total number of products available in each filter. Just select the filters and click on Refine Search to see the filtered product listing.